

Apex Legends Loot Tier Map
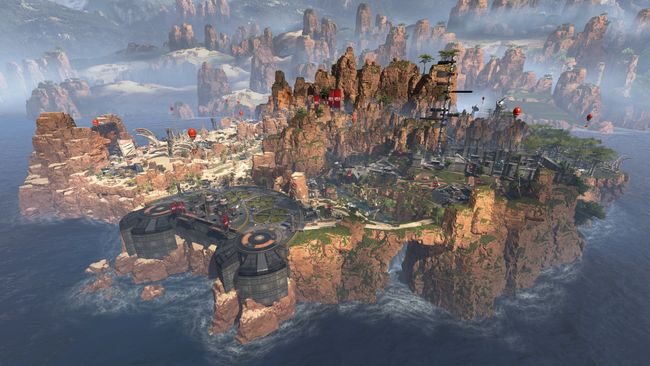
Apex Legends' map doesn't piece of work like other battle royale games. Each location has a gear up loot tier, meaning it is more likely to produce high-tier, mid-tier, or depression-tier loot in flooring drops and in chests. While everyone has their favorite drop locations in Apex Legends, mastering the map depends more on securing and area with peachy loot and little competition.
Read on below for our Apex Legends loot map breakdown, which includes what you need to know virtually the boodle tiers for every surface area in Apex Legends' map.
Noon Legends map and boodle tiers

We don't yet know the specifics of how Apex's loot randomization works, but here's the important bit. Each zone has a differently weighted risk for the loot tiers in every game. Most of the time you drop into Airbase, for example, you tin expect loot to high-tier, but there will be outliers.
Caput toApexmap.io for the probability of each zone being a particular tier (you can even contribute data to assistance track the different probabilities).
—High-tier loot zones—
The best boodle zones tend to run the perimeter of the map, maybe to compensate for the fact that they're more remote.
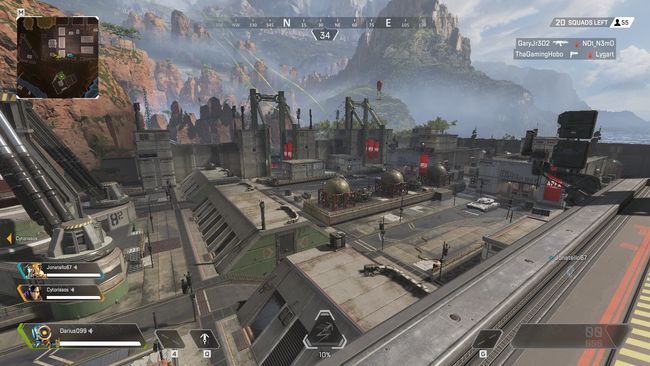
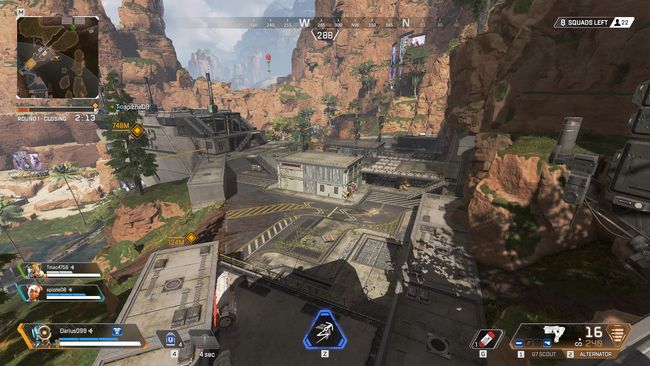
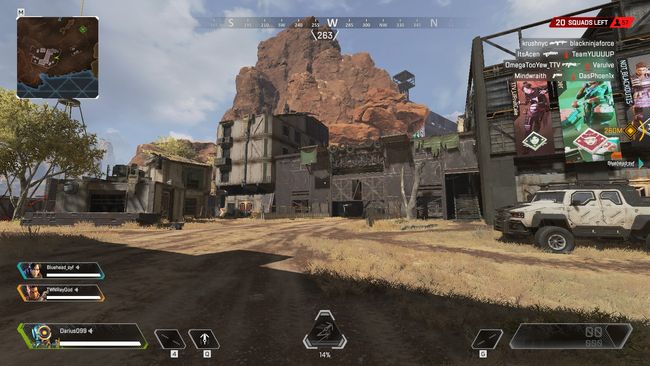
Arms (High Tier)
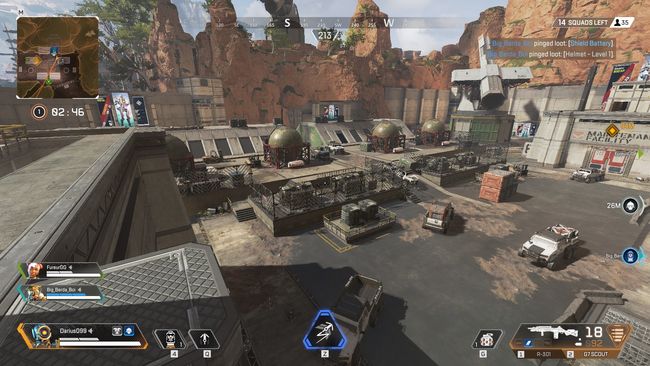
Artillery is i of the nearly plentiful zones on the Noon Legends map, with six large buildings, three small buildings (two rooftops, and one out the southern get out) in addition to a number of supply crate locations. Fights in Arms are usually cruel shut- to mid-range affairs, with valuable high basis on height of both buildings and the zipline-connected balcony of the northern bunker.
Pros:
- There'southward enough loot to take a shot at equipping your entire squad.
- Half dozen supply bins when exiting west (through Artillery Tunnels) and plenty to the south (the grassy fields leading to The Farm).
- Respawn beacon in Artillery makes recovering from almost-losses easier.
Cons:
- Often a long sprint to continue up with the ring.
- Loftier cliffs surrounding the base and the remote location tin can make a clean entry hard when the dropship is far.
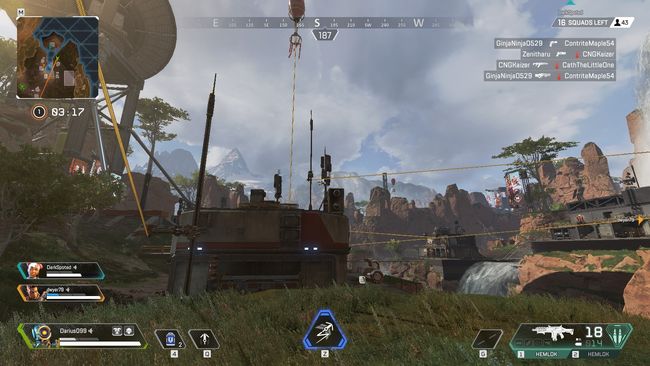
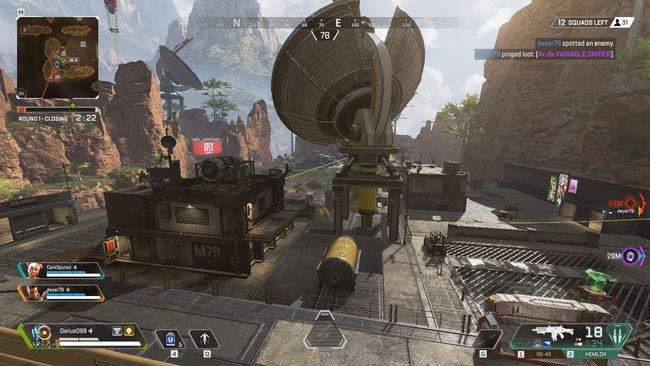
Relay (High Tier)
Another fairly remote choice, Relay is perched in the northeastern edge of Kings Canyon and marked by a large sunken concrete area with supply bins, a massive satellite dish, and eight buildings surrounding a waterfall. If you're forced into a fight in the surface area, be cautious nigh sliding off surfaces or ziplines as your momentum can easily bear y'all into the abyss.
Pros:
- Directly adjacent to Wetlands for an piece of cake rotation to/from.
- Pretty large quantity of loot, enough to equip your unabridged squad.
- Ofttimes ignored, yous'll probably be unchallenged as Swamps seems to be the more than attractive driblet location for about players even if the dropship runs in the area.
- Respawn beacon nearby (on top of the waterfall, partially sheltered from low ground)
Cons:
- Located in a corner of the map, it'll frequently be the outset hit by the advancing band, so you lot'll need to loot quickly.
- If Swamps was attainable from the dropship, be extra careful when exiting. You'll oftentimes run right into people rotating to Wetlands towards Relay.
- The jump balloon present in the area isn't the most useful given its positioning.
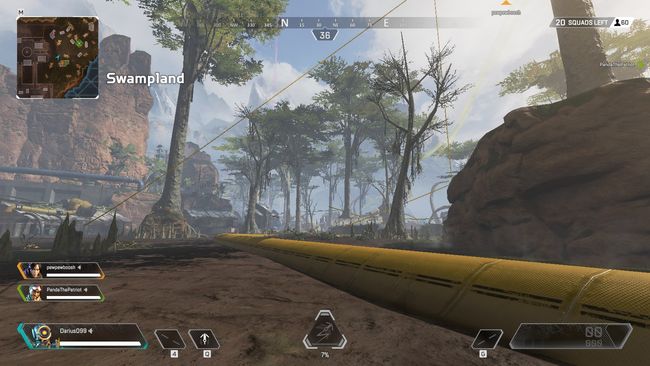
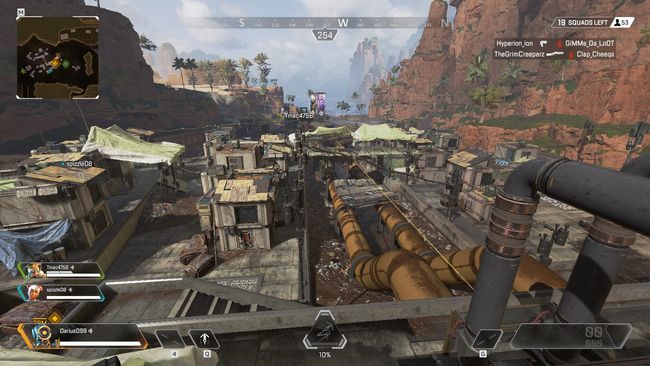
Swamps (Loftier Tier)
A huge and far-flung lowland on the eastern edge of the map, Swamps represents the single largest area in terms of full volume of boodle. However, this comes at the cost of the time it takes to rush the expanse, and the take a chance of having to climb to college footing to get out.
Pros:
- Iii good rotation options available (northwest towards Wetlands, westward through Hydro towards Bridges, and southwest towards Repulsor).
- Such a large diversity of boodle y'all tin unremarkably not but get your squad fully equipped, merely oft find your favorite gun.
- Ziplines help with moving around the area faster.
- Respawn beacon located in the southern part of Swamps, side by side to a bound airship.
Cons:
- Being on the edge of the map and taking a long time to loot isn't the best combination. Expect to often exist running with or after the band.
- Very pop.
- Leaving can put yous in a disadvantaged fight confronting other squads on higher ground.
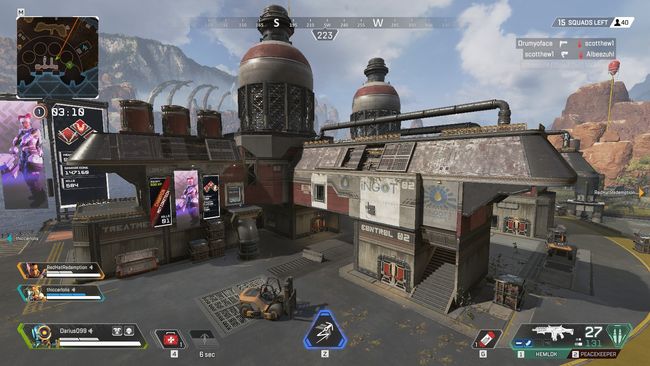
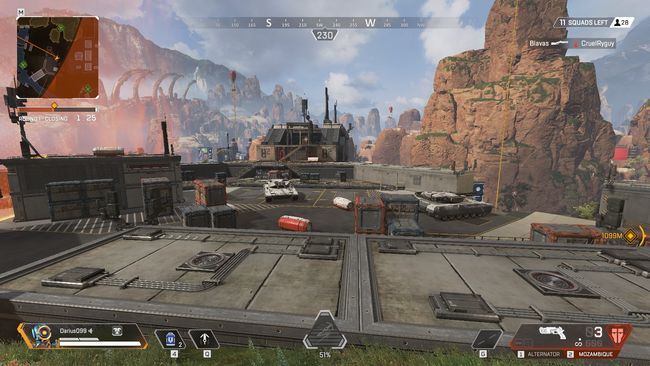
Repulsor (High Tier)
This large war machine circuitous on the southeastern edge is linked by two massive bridges to Hydro Dam, and has a fairly full-bodied jumble of pocket-sized buildings, three trapezoidal bunkers, and a pair of massive buildings linked by hole-and-corner service tunnels. Get ready for deadly fistfights in tight quarters inside the massive tank storage buildings or their tunnels.
Pros:
- Compact, with two large structures.
- Should be easily enough to equip an entire squad.
- Great rotations are available, being next to Watchtower Due south and River'due south Cease.
- A respawn beacon is nearby.
Cons:
- A very popular dropsite.
- Early fights will oftentimes attract anyone who dropped on Hydro Dam.
Water Treatment (High Tier)
A cluster of walkway-continued industrial buildings and a few outside storage bins make upwardly the small-scale lootable expanse at the eye of Water Treatment. The outlying treatment vats take little to nix of value and don't offering much cover, so be aware when moving through them.
Pros:
- Water Treatment is tightly grouped. The buildings are and so close together that your squad can chop-chop grab everything of value and move out.
- The airship placement around the dorsum is very convenient when you're done annexation, and redeploying skillfully can have yous straight to several great spots. We recommend the zipline just barely into River's Stop that volition take you straight into Watchtower South.
Cons:
- The quality of loot is high, but because quantity is depression, you lot'll sometimes find a bounty of attachments y'all don't demand.
- Bad rotation options. The best bet is probably towards Watchtower South and River'due south End/Repulsor if you're prepared for a possible fight. You can as well make the balloon spring & run to Skull Town if y'all're comfy in one of the most contested zones.
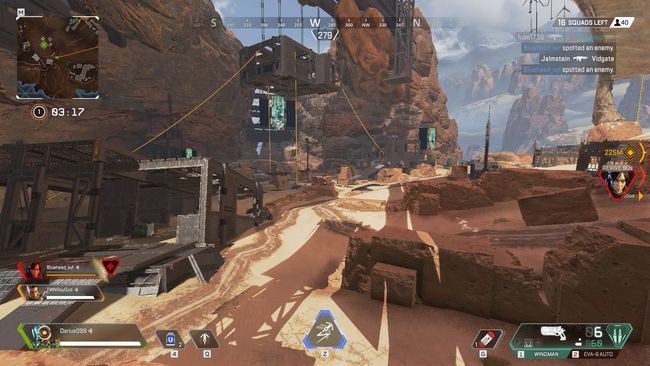
Thunderdome (High Tier)
An open up sandy bowl, the Thunderdome has 3 big multi-level 'muzzle' structures with some thin loot at footing level, 1 larger multi-level 'cage' that hangs from the rocks above accessible from ziplines, and a few smaller platforms on the northeast side. Firefights here tend to be brawls in the center, ducking between the rows and piles of stones, but in that location are also long sightlines beyond the area, so be aware of the nearest cover.
Pros:
- Lots of choices for movement. W and South Settlement are both decent 'safe' choices since they're rarely dropped on, or you can try to fall into the usual brawl at Skull Boondocks with a leg upwards in guns & gear.
- A respawn beacon is present right in Thunderdome for a quick recovery after whatsoever initial losses.
Cons:
- The boodle here isn't always going to outfit you. You're most certainly going to need to hit another place or two—or win some fights—to be properly outfitted.
- Pop.
- Layout and quantity of buildings makes it very difficult to reach and protect squadmates who are separated from you.
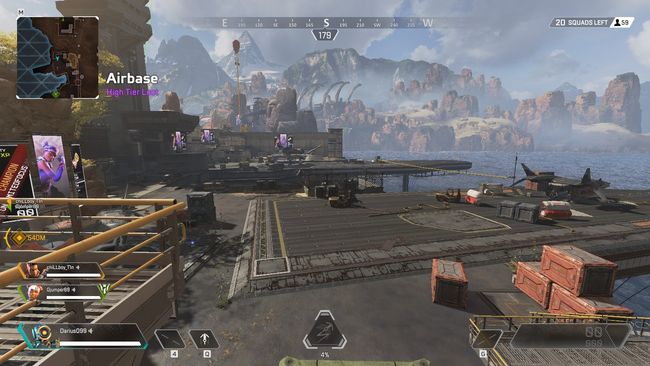
Airbase (Loftier Tier)
With two large runways jutting out into open air and a massive perimeter wall, airbase is a unique location. The zipline betwixt the two runways is a deathtrap if enemies notice you on it, so be cautious almost using it. Loot is spread out betwixt jumbles of supply bins, the interior of 2 aircraft, and a few small buildings, and takes awhile to assemble up unless your squad is very organized and communicates well.
Pros:
- Good corporeality of loot, although information technology'south adequately spread out.
- Another high-tier loot location with a respawn buoy, which is especially important because Airbase tends to go more than than average numbers of people dropping.
- Rotations are pretty proficient. Runoff is a staircase away to the north, and the zipline on the southern exit leads right to Due west Settlement. Just be cautious with the zipline as it goes over a chasm.
Cons:
- Non a great identify to be when someone gets high ground on yous, and nearly all the walls and entrances will give squads who arroyo this advantage.
- Long sightlines across the two runways can be frustrating to deal with if your drop is contested—hoping to notice the appropriate gun/telescopic isn't the best feeling.
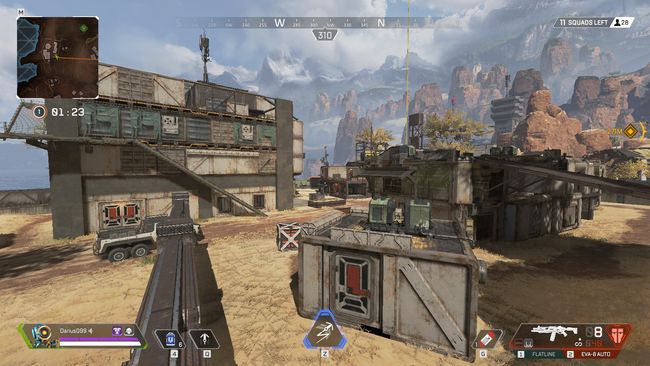
Runoff (High Tier)
With its string of continued industrial buildings, Runoff has well-concentrated loot. There are a couple of supply bins outside, and nearly people often forget that the unnamed complex to the westward is part of the same loot zone—don't forget to cheque it.
Another good tip, particularly if yous're dropping hot, is to retrieve that the two small buildings upwardly on the wall (east primal and southeast) are about guaranteed to have guns in them. They won't have much else, simply this can get you lot that all-important early firepower.
Pros:
- You'll ordinarily go out Runoff with your team geared up.
- Airbase, The Pit, or if you're fast enough, Slum Lake, are all adjacent and good choices. Choice one and continue to polish your boodle quality or chase gunfire.
Cons:
- Runoff is a popular dropsite. Focus on getting that early gun if you lot drop into a scrum.
- Bad respawn beacons. The western ane is closer to the edge of the map, and the one to the east is incredibly exposed to long range fire/spotting.
Bunker (Loftier Tier)
Bunker is a cramped and deadly dropsite. In that location are three supply bins on the west side, two on the east side. On the inside is a long staircase going down to the east. At the bottom on the east side are iii small rooms with loot. At the summit of the stairs on the due west side are two long rooms with loot. Fights here are roughshod, awkward, and oftentimes devolve into punching and logjams around doors.
Pros:
- Looting bunker ordinarily takes less than a minute if you're unopposed.
- Caustic shines in Bunker at all stages of the game, and can really control this space well if you lot want to play him hither and try to win a brawl.
- Can be a skilful spot to driblet if you lot're looking to improve your aim and reactions since you're unremarkably guaranteed a fight.
Cons:
- Bunker may be the single about pop dropsite in Noon (competing with Skull Boondocks and the Supply Ship).
- Closest respawn buoy is pretty exposed, out nearly High Desert to the southwest.
- Oftentimes non plenty loot to equip a squad.
- The only shut rotation spot is Cascades, which isn't a bad choice, but can be crude if it'south immediately contested and your squad is notwithstanding missing guns or toting the dreaded Mozambique.
The Pit (High Tier)
Wrapped in towers of stone, this secluded spot seems attractive, only The Pit is a trap you should be careful not to dwell too long in. With three entrances and virtually no cover, it'south all-time to catch and go. Sparse loot is scattered on the ground and in a trio of supply bins. Go along your ears open for a loot tick, which is sometimes stuck to the upper part of the wall.
Pros:
- Pit seems to nigh always have a tier three (imperial) armor in the centre (though occasionally we've been bamboozled by a Phoenix Kit).
- Takes less than xxx seconds to boodle completely.
- If you're confident, it can be a decent choice to split ane person off to drib Pit when the other two are hitting Runoff or Slum Lakes.
Cons:
- Very little loot. Your squad won't leave geared upwards for a fight.
- Your best rotation spot is either Slum Lakes or Runoff. Given the popularity of Runoff, it's likely you'll exist tardily to a fight you're unequipped for.
- With lilliputian cover and three entry points, getting caught in hither can exist a rough fight.
Supply Ship (High Tier)
Slowly and noisily floating over the map, the Supply Ship is a three-deck flying trap. Yous'll oftentimes discover ane landing near you in the belatedly game simply to discover it's basically a car up on blocks, already stripped bare before in the circular. You'll discover caches of loot that unremarkably include guns and the highest tier at the bow and stern of the topmost deck, and several caches more in the lowest (interior) deck that sometimes include higher tier loot and ever have guns. Fights here will be determined by who gets punched off the send and/or who gets a gun first.
Pros:
- You can sometimes recover from losing the early fight by simply crawling off the side of the Supply transport and waiting for an ally.
- Very quick to loot completely.
Cons:
- Heavily contested. Competes for most popular dropsite with Bunker and Skull Boondocks.
- Who'south driving this thing? Where you'll be when you're done looting is a roll of the dice.
- Not enough boodle to fully gear a team.
- Can be difficult to land on, and if you miss the transport, you may exist off to a crude start in the middle of nowhere.
Watchtower North (High Tier)
A huge military monolith dominating the view of the river valley around information technology, including a perfect vantage point over Cascades. Loot is spread within the bunker (don't forget it has ladder access to the roof—useful for a flank or escape), and betwixt a few supply bins and a pair of small buildings.
Pros:
- A zipline runs from the roof to the west side of Cascades, giving you the pick to quickly close with other squads below.
- Connected to Artillery by Artillery Underpass, which can be a great style to quickly gear and and then option a fight with squads who dropped in Artillery.
- This elevated overlook provides excellent visibility for plotting your next move.
Cons:
- Modest quantity of gear. You won't always go out with your squad fully geared.
- While in that location is a zipline that gets you nearly information technology, the closest respawn beacon requires you to commit to moving to Cascades.
Watchtower South (High Tier)
With the aforementioned prominent bunker and setup as its twin to the northward, Watchtower Southward unfortunately doesn't run across as much traffic, so its vantage point isn't quite every bit useful. Watchtower South is too missing one of the two buildings present at its counterpart.
Pros:
- Direct zipline access to the northeast edge of H2o Treatment (one of the longest ziplines in Kings Canyon).
- Adjacency to Repulsor and River'south Finish ways plenty of options for rotation.
- Great vantage point to cheque adjacent areas earlier moving.
Cons:
- Won't always fully gear your squad. Gun choices will probably still be limited. Supply bins are a bit of a crapshoot.
- Expect contact when you beginning to move. River'southward Stop, Repulsor, and Bridges are all ordinarily pretty busy.
—Mid-tier loot zones—
Stick near the center of the map and y'all'll probably hit a mid-tier zone.
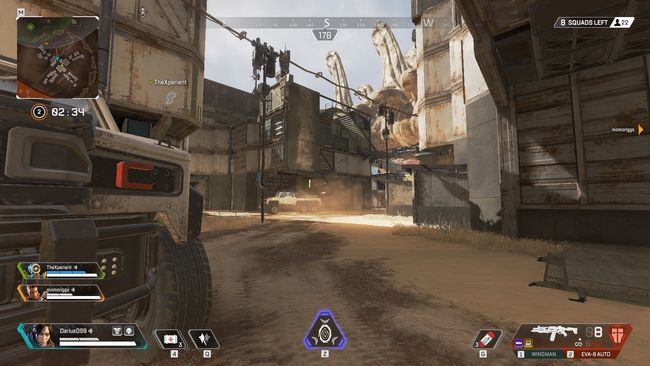
Skull Boondocks (Mid Tier)
Skull Town is the biggest shantytown in Kings Canyon, and often the busiest dropsite. There are close to ii dozen buildings, most multi-room, in addition to fences, tarp-covered pens, and three rooftop spots to loot. If you're dropping on Skull Town, your all-time bet is to make for the rooftops where there's mostly a guaranteed gun and a little more freedom of move.
Tips:
- Be prepared to brawl near of the time when dropping on Skull Boondocks. And be enlightened that if people are dropping on Skull Town, they're likely also dropping on nearby places. Ofttimes, you'll finish your second or tertiary fight in Skull Town and be set upon by a squad fresh from looting Thunderdome or somewhere else nearby.
- Know when it'due south time to get out. Pull indoors after winning a fight, heal up, and loot as fast as you can and so you can brand tracks.
- Skull Boondocks is an excellent spot to drib if you're wanting to work on your early shooting and brawling skills (or just want a quick and dirty fight).
West Settlement (Mid Tier)
A serial of small buildings, a medium bi-level, and a single large i with a staircase to the rooftop make up the West Settlement. A zipline leads to Artillery, and there's a convenient balloon if you want to try to redeploy on Skull Town.
Tips:
- Be conscientious using the zipline to/from Artillery—it's over a chasm, and is fairly level, and then it's like shooting fish in a barrel to get caught on information technology in a no-win scenario.
The rooftop of the big building tin be the best outset-loot in a driblet as it commonly has at least 1 gun, and is easy to land on. Information technology's also got good sightlines towards both Skull Boondocks and Thunderdome.
South Settlement (Mid Tier)
A pair of rooftops over a big garage, South Settlement isn't big, which makes it adequately quick to loot. This should be your start destination after Thunderdome if yous aren't rushing for an immediate fight—it's oft overlooked, but can really fill out the residual of your squad's kit.
Tips:
- Don't forget to check the rooftop, or to drib there starting time if you're dropping on Southward Settlement—usually there'southward at least one gun up there, and sometimes a full kit with shields.
Slum Lakes (Mid Tier)
A sprawling collection of ramshackle slum-type buildings, Slum Lake is bisected by a agglomeration of pipes over a long trough. The eastern stop has a few buildings on college ground worth checking as well.
Tips:
- With Slum Lakes beingness a series of samey buildings, you can lose your sense of direction easily, and your sightlines are limited. Try to maintain an easy path to your teammates as you scrape this zone.
- Boodle equally chop-chop as you tin can—Slum Lakes is in the Northwest corner, and often will quickly be overtaken past a far ring.
- While Runoff and Pit are both good choices to cheque next, don't overlook the under-cliff houses strung to the north/northeast, which can fill out the rest of your kit while you transition to Cascades and Watchtower North.
Wetlands (Mid Tier)
Wetlands is about a dozen buildings, a collection of low ground and high footing with some ziplines. The tiny passage towards the fields due south of Arms is an easily defended choke point, and it's important to note the commanding sightlines you go from the southwestern tip of Wetlands towards Shattered Forest and The Farm, be wary of approaching Wetlands from these directions if you know people dropped there.
Tips:
- Rotating northward towards Relay can be dangerous if you know people dropped there—you lot'll be going uphill without much cover.
- Several rooftops are attainable without Pathfinder—this can be a large advantage in sightlines and midrange fights.
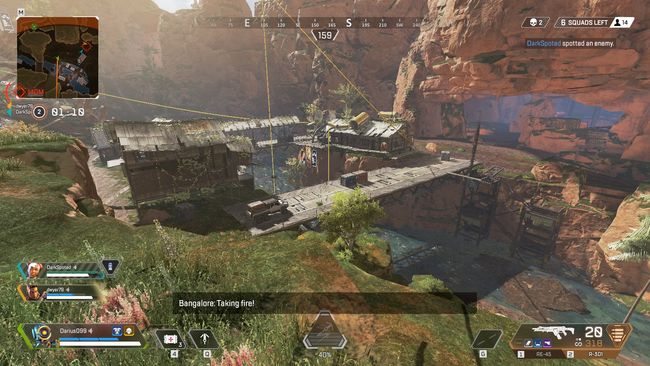
Bridges (Mid Tier)
True to its name, Bridges straddles the lagoon area with a pair of spans, and also has two larger buildings and 4 smaller ones, plus a two-level 'overhang' building on the ridge above.
Tips:
- The respawn beacon northward of the overhang building may be the well-nigh unsafe in all of Kings Canyon, with no less than six points where players can sally from other parts of the map and have an angle on both respawner and respawnee. Like Pit, it'due south non a position you want to occupy for longer than you lot take to.
- Going up the zipline to the overhang to attack enemies enlightened of you can be suicide—looking down the zipline on an enemy coming up makes for easy headshots.
The Subcontract (Mid Tier)
There's not a ton at The Farm, but don't neglect the underground surface area, which usually has a pocket-sized amount of loot and a couple of guns.
Tips:
- Note that you tin get a sightline from inside the circular hush-hush bedchamber all the manner up to the crest of the hill towards Cascades. This can be a good identify to deadfall from or watch an angle.
- The Farm is a convergence betoken for a whole bunch of routes to and from. Be aware that if you linger in that location, you're probable to encounter another squad pretty quickly (and so probably draw in more with your firefight).
River's End (Mid Tier)
River's End is a long sprawl along the river, stretching all the way down to the northeast side of Water Handling and made upward of almost a dozen buildings. The eastern bank climbs sharply to tiered cliffs, including a respawn beacon tucked abroad in the mountains.
Tips:
- Be careful getting caught in the lagoon. Anyone above will have an easy bead on y'all, and water cancels your momentum when sliding.
- Don't fail the northern overhang. The two buildings here are easy to defend and provide good sightlines.
—Low-tier loot zones—
These aren't places you lot want to prioritize when landing, but they might make good defensive positions later in a match.
Hydro Dam (Low Tier)
Hydro Dam has a few supply bins, and four symmetrical buildings. The diverseness of pipes and structures tin can brand you feel secure in cover, but don't underestimate the long sightlines from the s. Repulsor is in a higher place than Hydro Dam, and the bridges (or tops of the walls) give splendid firing lanes.
Tips:
- Information technology'southward all-time not to linger in Hydro Dam, it'due south in the middle of several pop drib sites, and is a natural route towards Bridges.
- The interior section leading towards Bridges oftentimes has a few guns, even if they aren't the all-time.
Market (Low Tier)
A ramshackle indoor slum, Market has a lower open-air surface area that is deadly to be caught in by fire from the second-floor walkway surrounding it. Stick to the college walkway as much as you can, and have notation of the easy roof access.
Tips:
- Market tends to be a common drop location due to loot density. Be aware y'all're probably committing to an early on ball if you drop on it.
- Proximity to several mid-tier boodle locations makes staying in Market an even worse thought than information technology already is. Loot the nuts and GTFO.
High Desert (Low Tier)
Noteworthy for the massive tower on the hill, High Desert is made upward of a few small and medium sized slum-style buildings clustered together next to a hill with a few more. The tower often has at least a small amount of ameliorate quality boodle almost the summit.
Tips:
- The tower in Loftier Desert can make an excellent vantage point to get an thought of who is moving where, or spot out enemies to engage. Don't underestimate the value of taking information technology later on in the round either, if the circle allows it.
Eastward Settlement (Depression Tier)
A few clusters of buildings that get up in tiptop as you become northeast, Eastward Settlement has a small platform on top of the most northeastern building. This platform can provide adept sightlines on the south side of Marketplace, and may exist worth using to spot squads out from.
Tips:
- Exist enlightened that the 'shooting platform' doesn't offer a ton of encompass, and so yous may need to leap off in a bustle.
Landing Pad (Low Tier)
With just a single building, Landing Pad is actually just a whistle stop when heading to or from Repulsor. Information technology'due south one of the almost mutual places that people respawn squadmates at later on early fights in Repulsor, so be aware you may exist able to catch an unprepared squad if you discover the dropship coming by.
Tips:
- Immediately redeploying with the convenient balloon is a smart idea after respawning someone, just effort not to do it if y'all're already under fire.
The Shattered Forest (Low Tier)
A small armed services outpost on the edge of the burned wasteland, the four buildings tin can provide a few guns and a moderate amount of loot. There'due south also an underground area, but it doesn't seem to have boodle often, and thus is merely a place to hibernate or sneak around the area.
Tips:
- This is a very low traffic spot, maybe one of the least visited in Kings Canyon. It's not an awful pick for a last-infinitesimal diversion from Swamps if it looks overpopulated.
Artillery Tunnel (Depression Tier)
Petty more than a long tunnel connecting the west end of Arms to the northwestern side of Cascades, there are a few supply bins along the way (and a few on a catwalk in a higher place halfway through).
Tips:
- On a contested Artillery drib, it's a good thought to drib one member of your squad near the archway of the tunnel and duck in for the get-go two bins—this will often net a gun or two and armor for the fights, commonly unopposed.
Artillery Underpass (Low Tier)
A short downhill slide to Watchtower Northward (or a short run uphill to Arms), Underpass doesn't provide much loot, and isn't much more than a named footnote.
Tips:
- If you lot have to escape Artillery, this is a pretty quick rotate sliding downhill towards Watchtower Due north, and it may even net you a gun on the style.

Apex Legends Loot Tier Map,
Source: https://www.alienwarearena.com/ucf/show/1994333/boards/gaming-news/News/apex-legends-map-loot-tiers-and-tips-for-every-location
Posted by: daleybire1955.blogspot.com
0 Response to "Apex Legends Loot Tier Map"
Post a Comment